Akash Network is developing Supercloud, the world’s first and only decentralized cloud computing marketplace, enabling any data center and anyone with a computer to become a cloud provider by offering their unused compute cycles in a safe and frictionless marketplace.
Akash Supercloud enables organizations to access the 85% of server capacity currently underutilized at 8.4 million data centers, and on individual servers.
The Supercloud platform achieves these benefits by integrating advanced containerization technology with a unique staking model to accelerate adoption, built on Tendermint and Cosmos. The Akash Token (AKT) is a utility token used in the platform to achieve economic security, incentivize early adoption, and normalize exchange rates.
First in the process is to install Akashlytics (Akash desktop app with built-in wallet). Once you have the Akashlytics installed, you may proceed to create new deployments.
In this section (taken from Akash Network Official Guide) we will use the tool to deploy our own example WordPress page on the Akash Network. You can follow the same process for any other workload so long as it is containerized and you have an appropriate SDL.
STEP1 – Create the Deployment
- From the Deployments pane click the “CREATE DEPLOYMENTS” button.

STEP2 – Checking Deployment Pre-Reqs
- Before getting started make sure you have met the following requirements:
- 5AKT are available in wallet/escrow account.
- Valid certificate (on chain and matching cert locally)
- If everything is in order click the “CONTINUE” button

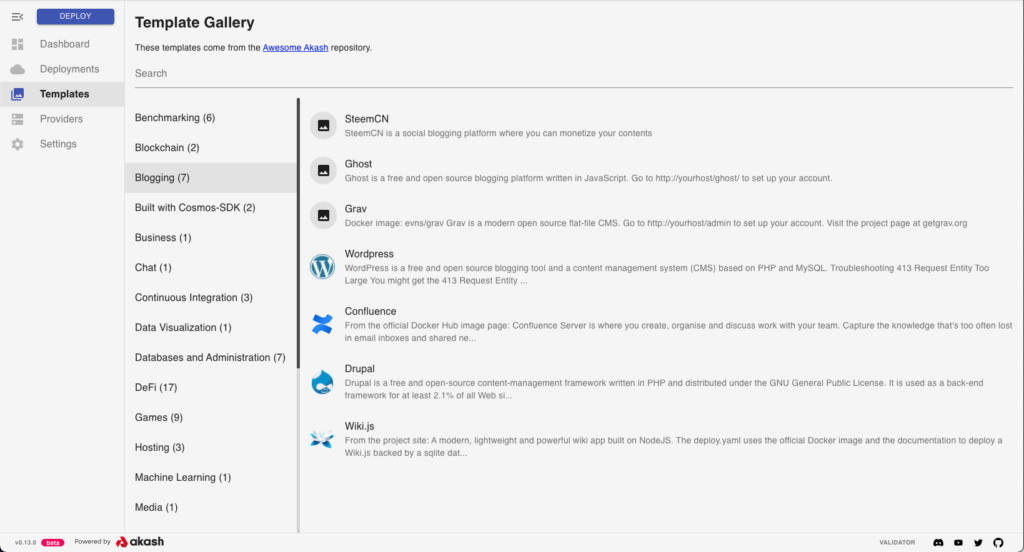
STEP3 – Choose Template
- The tool provides several sample templates including Games (Supermario, Minecraft, etc), and some more general (WordPress, Hello-World, etc)
- To deploy a custom application select the Empty template option
- Press “CONTINUE” with the WordPress template selected
STEP4 – Create Deployment
- If you select a empty template now would be the time to paste in your SDL
- Change the SDL file with your domain name in the SDL’s “expose” section and additional parameter under env:
- -‘url:https://<yourdomain.com>’
- Once you have changed the domain name, enter a name for your deployment in the top pane and press “CREATE DEPLOYMENT”.

Currently Akash Network does not support a public SSL certificate but generates a self signed certificate for your deployments. It is mandatory to use a third party service like CloudFlare or Route53 etc to force SSL offloading with publicly verifiable certificates.
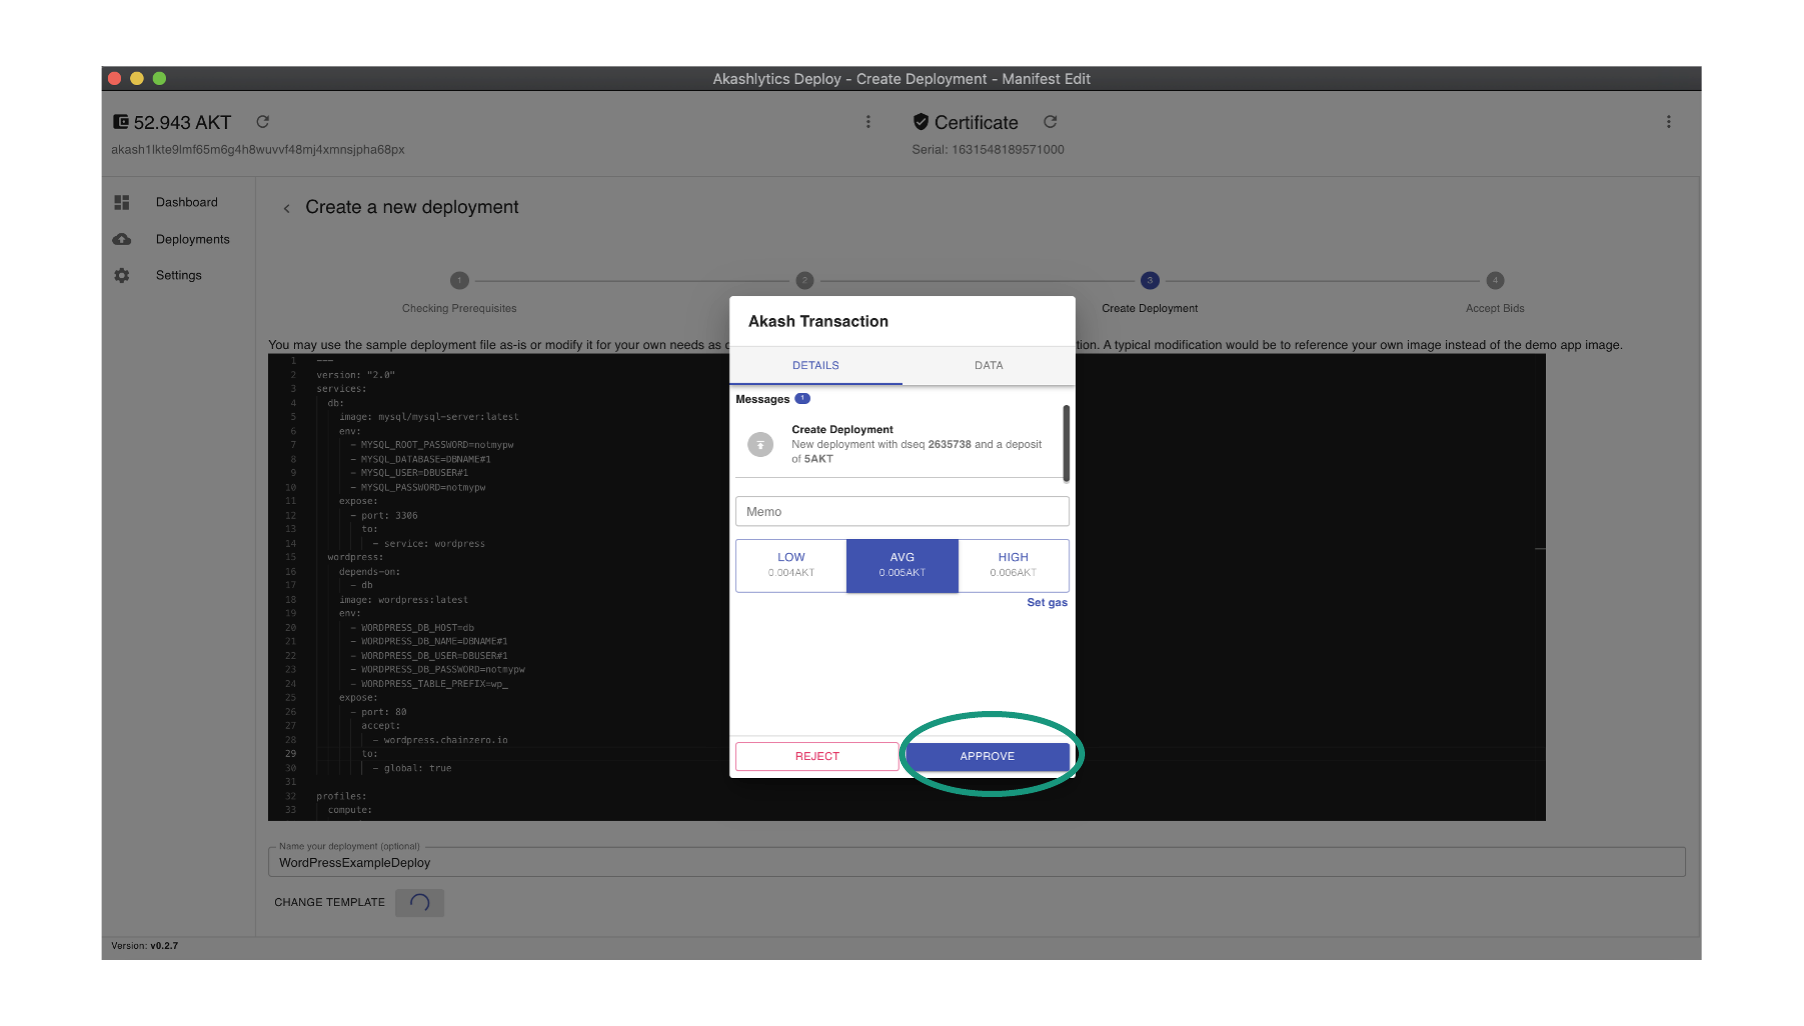
STEP5 – Create Deployment Transaction
- Once the process has kicked off a screen will appear asking for a selection of Gas Fees and to add the request for bids on chain. Feel free to use the defaults and select the “APPROVE” button.
Note: The process to write the transaction to the chain may take a couple of minutes to complete. This is true of every step that results in a on chain transaction.
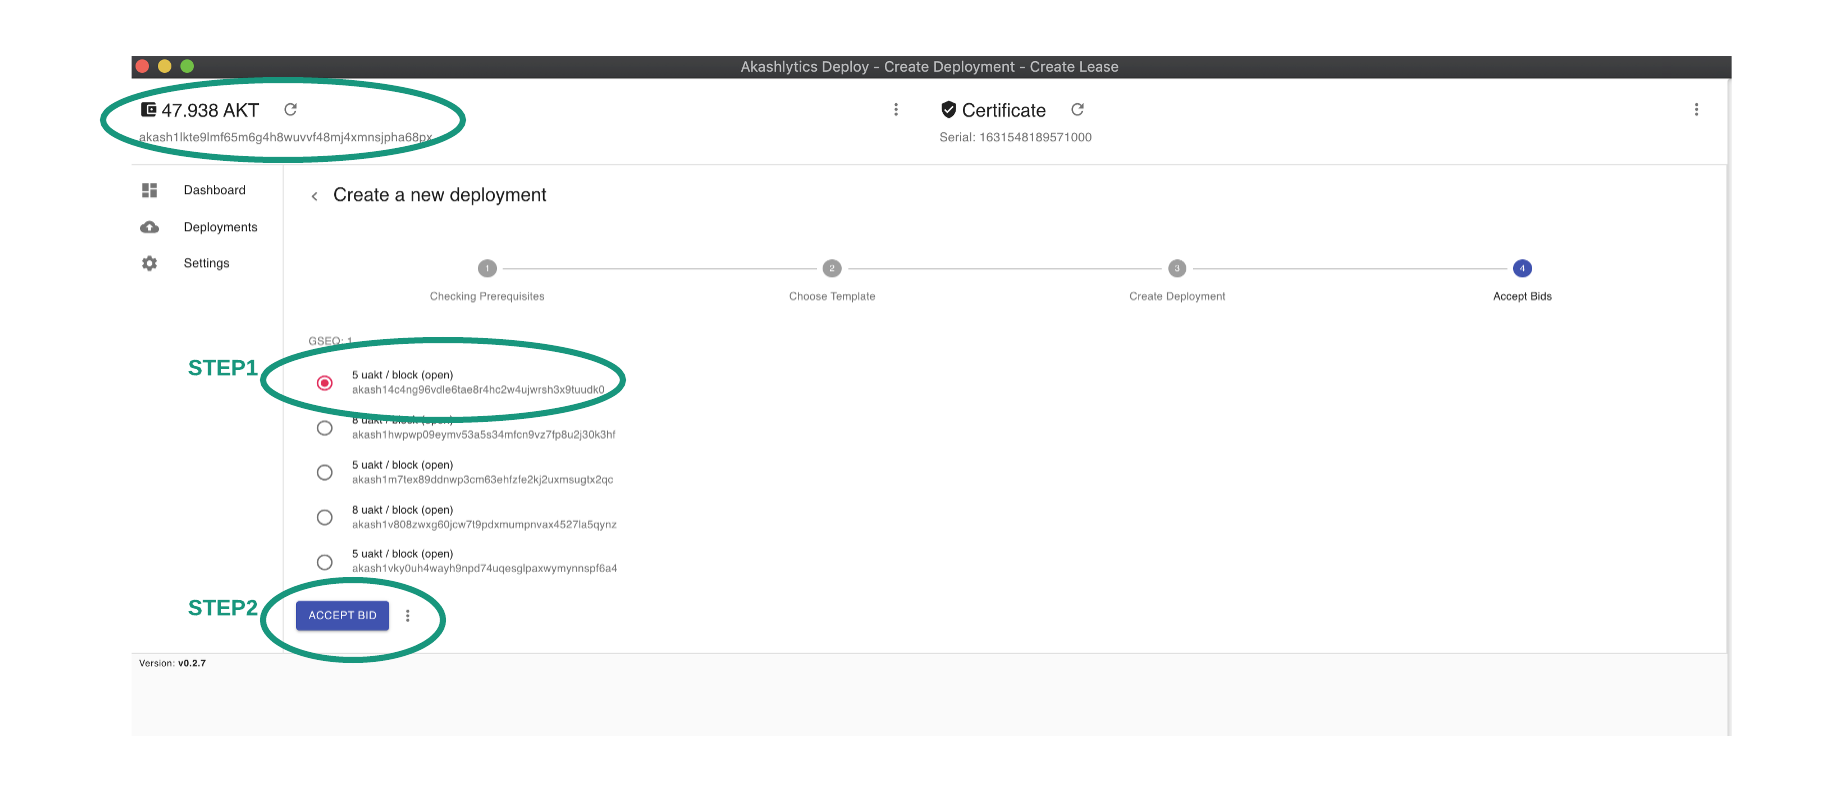
STEP6 – Review/Accept Bids
- After a minute or so a list of bids will display. Select the most affordable lease for this example deployment and then press “ACCEPT BID”
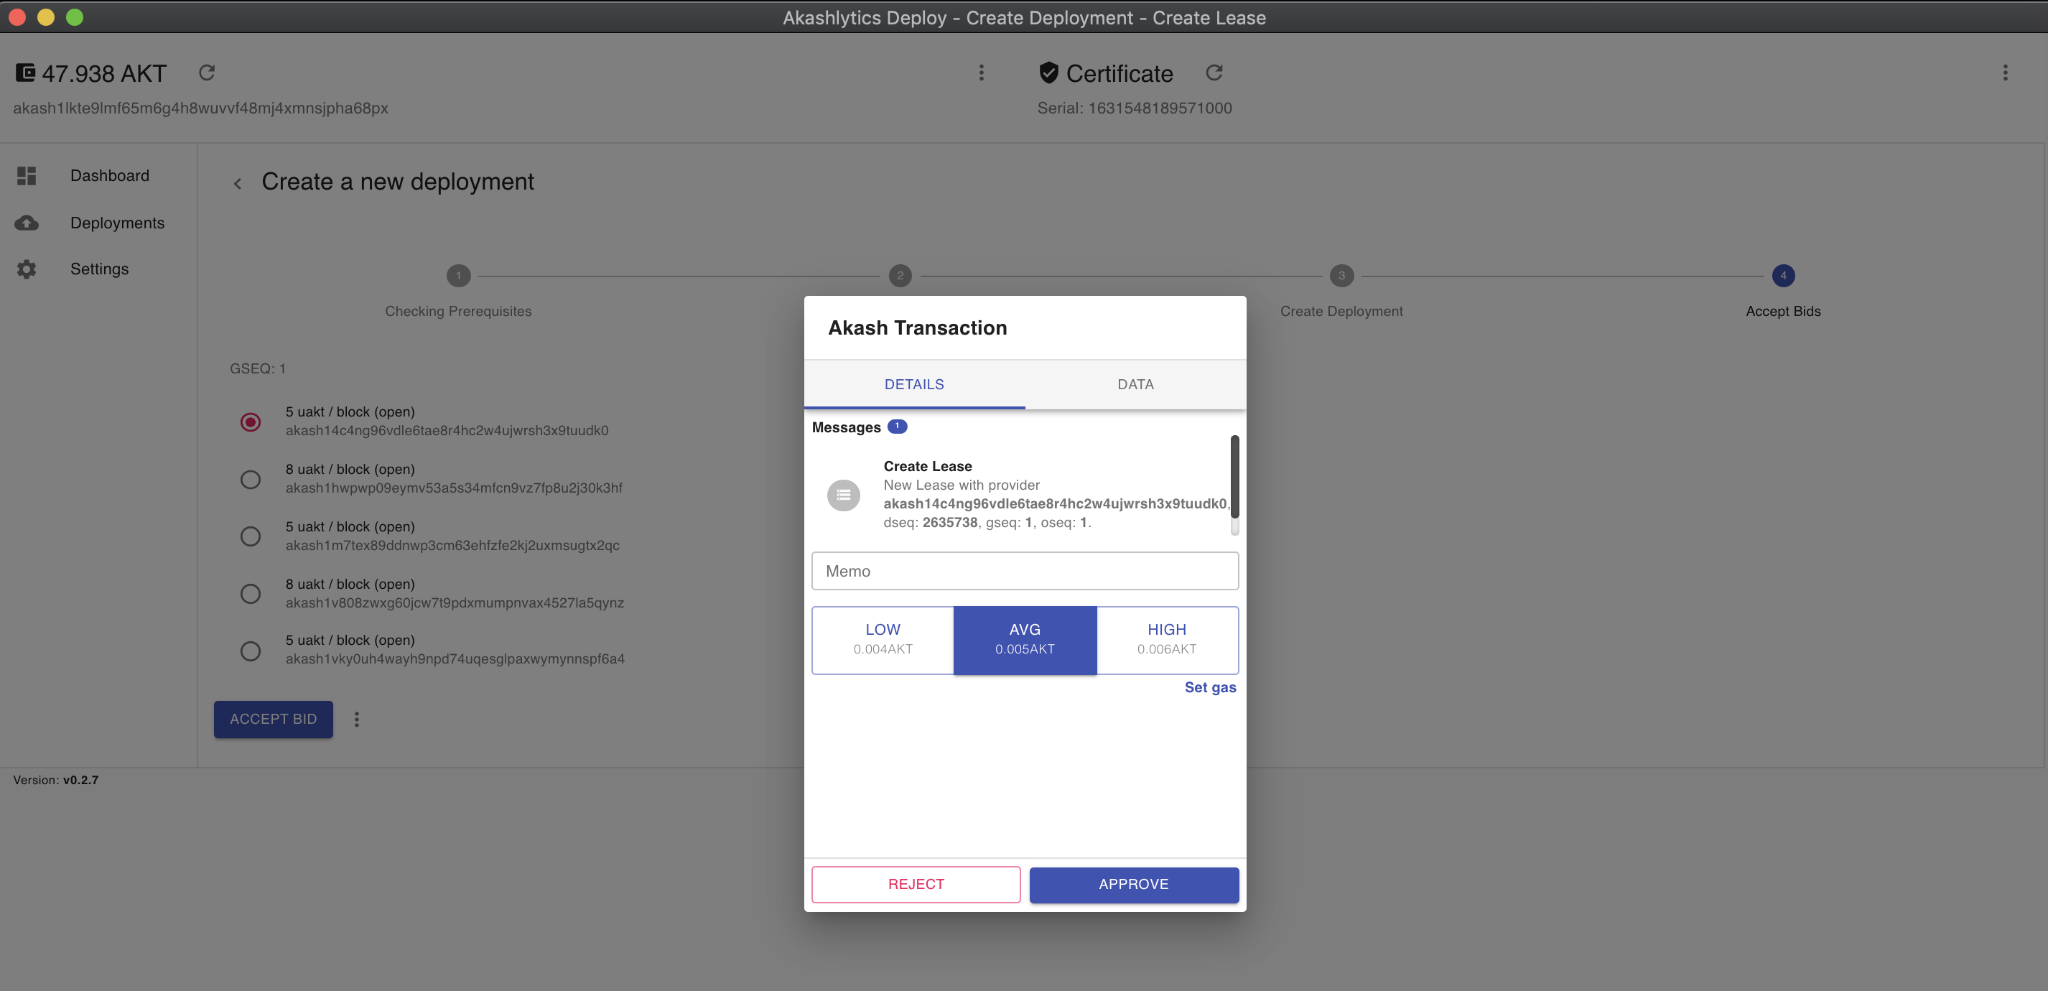
STEP7 – Create Lease Transaction
- Just as before leave the default selection for Gas Fees and click “APPROVE”
STEP8 – Post Deployment
Once the process is complete you can click the Deployments tab and select the new deployment. This is where you can interact with and retrieve information about the deployment.

- To easily navigate to the page you spun up click the icon to the right of the Akash URL
Note: The WordPress site may take a couple of minutes to load depending on the status of the deployment
Once you have your WordPress instance up & running simply head over to your Cloudflare account and create a new CNAME entry for your website. (Similar process on other proxy solutions as well)

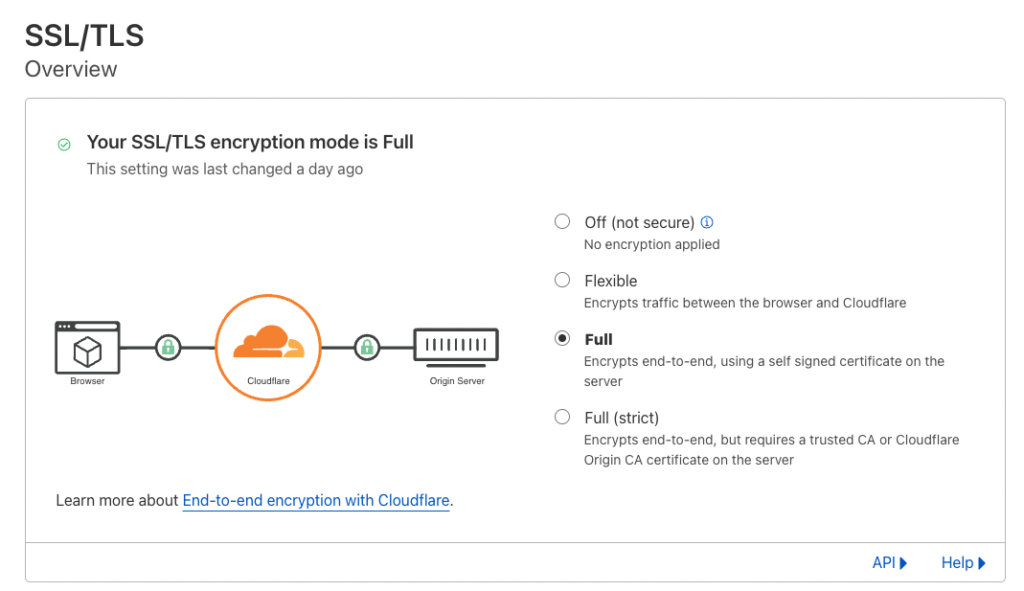
Once you have this entry created and your website is properly redirecting to the Akash network exposed URL, it is now time to force Cloudflare’s SSL certificate for the instance. To achieve this, Click on SSL on in the left pane and go to overview. Select ‘Full‘ as encryption mode to support end to end encryption with self signed certificate generated by Akash Network.
Next, you need to redirect HTTP (Port 80) to HTTPS (Port 443). To achieve this, click on ‘Edge certificates‘ and toggle ‘Always Use HTTPS‘ option as shown below
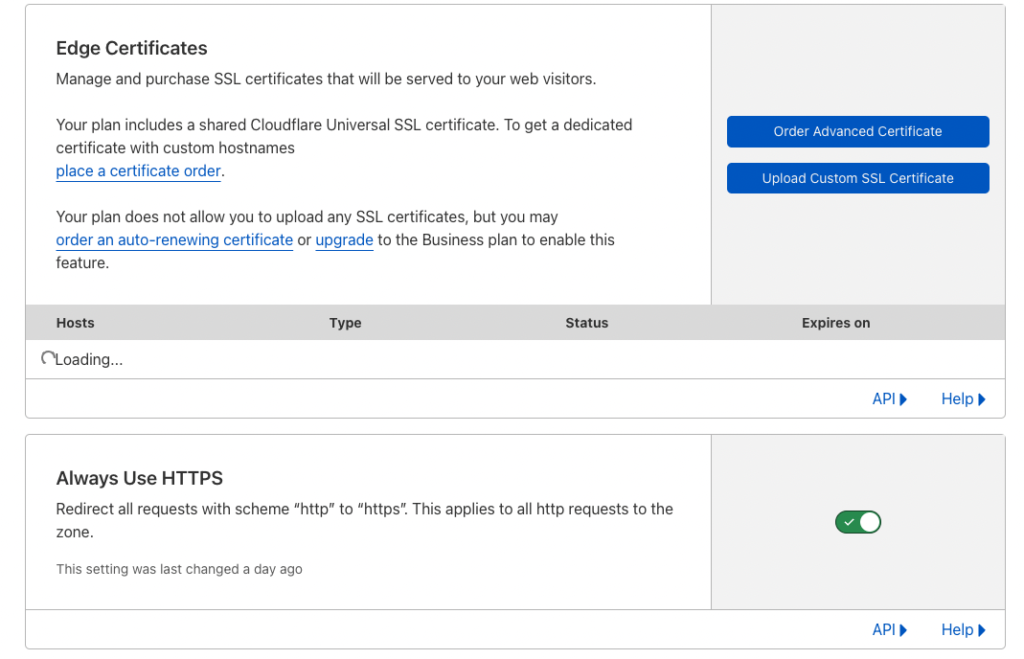
Now wait for approximately 5 minutes for the new settings to take effect and then you should be able to open your new website without any SSL certificate warnings.
Additional Information
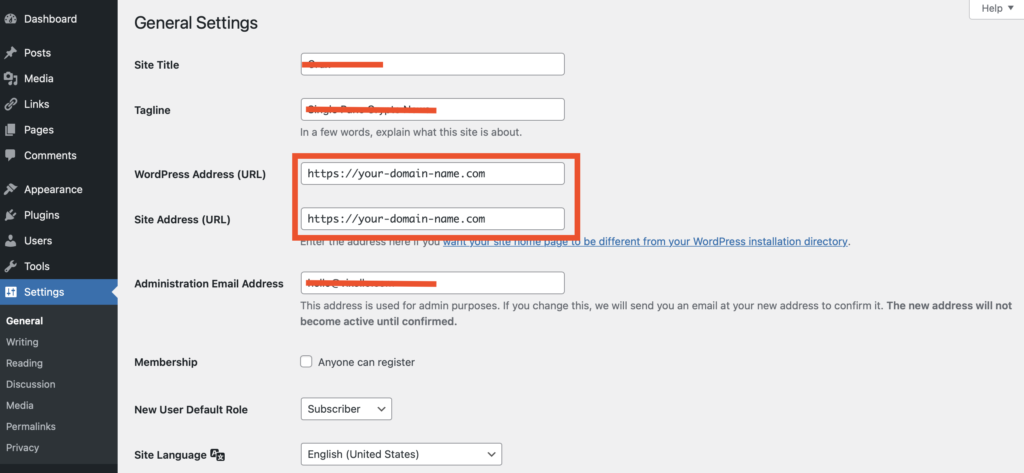
If your website redirects to Akash’s exposed URL intermittently then simply login into your WordPress Admin –> Settings –> General and change the website address from exposed URL to your domain name.
This concludes our guide for WordPress hosting on Akash Network’s Decentralised Cloud.
Please support us by delegating your $AKT tokens to your validator node